Endless Bliss | Happy Lifestyle Blog: diy
Showing posts with label diy. Show all posts

DIY Lovopoly Board Game.


The first time I saw Lovopoly, I knew it would be the perfect gift for me to make for my first anniversary with Jon. I can't believe it was so long ago that we were together. We're working on year four and still going strong (and living together)! I feel like this game was one of the most labor intensive things I've ever made for Jon. I really love making gifts for people, and I had to do it big the first time around. If you want to make a Lovopoly game or any other version of Monopoly, be sure you have enough time allotted, because it's not something you can do in a weekend.

MATERIALS
A game board (I bought a game from Goodwill with a fold out game board. You can also buy an actual Monopoly game so it has all the pieces.)
Paint
Cardstock (White and in assorted colors)
Mod Podge
Dice (2)
Monopoly houses and hotels (You can order these on Ebay)
Game pieces (These can come with the game you buy or you can make your own)
Clear packaging tape
Pictures
Markers
Large sponge brush or paint brush
Computer, paper and printer

DIRECTIONS

Game Board


1. Paint the game board whatever color you prefer. I chose black so it would cover up everything else that was on the original game board.

2. While the board dries, cut out 36 rectangular pieces of white cardstock of equal size for the game board and four square pieces for the corners. 

3. Cut out long, rectangular pieces for the properties on the board. You'll need eight different colors. Figure out which ones need three and which need two. 

4. Type up and print out the names and costs of the properties for your game board. I chose properties that were significant to Jon and me, such as Louisiana Tech (where we met and went to school), Bossier City and DeRidder (where we're from), and Istanbul and Australia (the #1 places on each of our travel lists). Instead of the railroads, I did four different cruise lines, and instead of the utilities, I did a drive-in movie and a picnic in the park. Instead of jail, I did the dog house. Instead of Community Chest and Chance, I did Family Jewels and Get Lucky. Get creative! It was so fun to come up with property and card types. 


5.Use mod podge to glue the colored rectangular pieces, property names and costs onto the game board as needed. You can also place some pictures on certain spaces. Use markers to decorate and label anything else as needed. 

6. Use the sponge or paint brush to paint mod podge all over the game board when it looks how you want it.

Money


1. Cut pieces of cardstock into rectangles, using seven different colors. 
-- 20 $500 bills
-- 20 $100 bills
-- 30 $50 bills
-- 50 $20 bills
-- 40 $10 bills
-- 40 $5 bills
-- 40 $1 bills

2. I cut round circles of seven different pictures - 3 of Jon, 3 of me, and 1 of the both of us. I printed these on regular paper. Glue these to the center of the cardstock.

3. Use a black marker to write the dollar amount on the dollar bills.

4. Optional extra step: Use mod podge to paint over the entire dollar bill.

Property cards


1. Type up the information for the cards. Do a simple Google search or look at the actual Monopoly cards to get the rent prices and all of the other information for the cards. 

2. Cut white cardstock into rectangles for the property cards. 

3. Coordinate the colors on the board with the colors on the card, and use mod podge to glue the cardstock onto the property cards.

4. I chose to write out the names of the property on each of the cards, but you can also print it out like the rest of the information on the card.


5. Optional extra step: Use clear package tape to cover the entire card to give it a laminated feel. Alternatively, you can also actually laminate the card. 

Community Chest and Chance Cards
I changed this to Family Jewels and Get Lucky.


1. Type up "Family Jewels" and "Get Lucky" in different fonts into rectangles.

2. Type up whatever you want for the cards. Be sure to include "Get out of the Dog House free" cards and cards that will make the players pay or receive money. 


3. Print these out and cut them up. 

4. Use mod podge to glue these onto pieces of cardstock.

5. Optional extra step: Use clear packaging tape to cover the cards to make it look like it was laminated.

Additional steps
1. Cut out pictures of you and your significant other to use as game pieces. I taped pictures to game pieces that were included in the game I bought. 


2. Wrap the game box in wrapping paper (I turned some wrapping paper onto the white side).

This was the original box the game was in.


3. Use markers or paint to decorate the box.

4. Collect everything into small boxes or Ziploc bags and place in the box with the game board.


5. Give to your significant other and prepared to be showered with lots of love.

6. And of course, PLAY IT! It'll be even more fun because it's personal to both of you.


I know my steps were pretty vague, but once you get started, it's pretty easy to proceed to the next step. I had a lot of fun putting all of this together for my boyfriend, and he loved it! If you have any questions or need clarification on any of the tips or need any tips, I'd be happy to help!

Have you ever made a Lovopoly game or any other homemade board game? 

This post is for the #SummerBloggerChallenge. This week's prompt: Write a tutorial. This can be a Craft/DIY project, a make-up tutorial, skincare routine, nail art, outfit tutorial, absolutely anything you like as long as it includes written instructions.

#SummerBloggerChallenge

read more " DIY Lovopoly Board Game. "

9 Things I Didn't Know I Needed Before Pinterest.

I don't know about y'all, but Pinterest changed my life when I first discovered it back in college. Pinterest basically said to me, "Yes, Tiffany, you can cook. And you can learn how to craft anything. And you can learn how to accessorize correctly and learn how to manage your unmanageable hair." Not only did Pinterest give me the confidence to cook, craft, and dress, it also showed me all of these amazing things that 1) I didn't know existed and 2) I need in my life ASAP.

Workout Alarm
{pin}
I mean, how handy is this? Instead of having my three alarms set at random times (i.e. 6:46 am) and then hitting snooze a ridiculous amount of times, I could have this weight that makes me do a set number of reps before it will stop going off. Yes, it will be annoying, but at least I'll be out of bed and not rushing to make it to work. Maybe I'd even have time for breakfast everyday. 

Inflatable Car Bed
{pin}
This whole concept is just amazing. I would always fight for the back seat on road trips. You can legitimately lay down and go to sleep on the road. My only question - how safe is it? I mean, there's no way to wear your seat belt and lay down at the same time. I'm not trying to get a no seatbelt ticket or get injured in a fender bender.

Shower Wine Glass Holder
{pin}
I mean, come on. There's never a bad time for wine, and while I've never brought wine into the shower, I totally would if I had this nifty contraption. Putting your glass on the side of the bathtub is way too dangerous. This is innovation at its finest.

Back Window Car Messages
{pin}
I have the worst road rage, and having this handy thing that makes faces at cars behind you is way too perfect. I don't flip people off, and no one can hear you when you're driving, even if you happen to be screaming at the top of your lungs about the stupidity of the passerby. This little gadget would be the perfect way to get my anger across.

Color Changing Umbrella
{pin}
While I would be under the umbrella and not get to see the full effect of the color changing, it would still be so neat to have. With this umbrella, it changes colors when water hits it. How freaking cool!

Nail Tip Tops
{pin}
I think every girl needs these. I have this problem where, after I do my nails, I either have to go to the restroom or I'm all of a sudden starving, and I can't wait 30+ minutes for my nails to dry. So I take a chance, and my nails all become casualties. I've never done my nails and have them all stay perfect. It just doesn't happen. But these bad boys could change everything.

Bracelet Key
{pin}
This would be so handy if I was going out with the girls and didn't want to carry around my key. Granted, it would be more helpful if it was my car key, but I digress. It's a really cool concept.

'Don't Forget' Door Knob Hanger
{pin}
Whenever I know I'm going to forget something in the morning, I usually just throw it in my purse and hope that I remember it's in there the next day. This would be so much better to have because I literally wouldn't be able to walk out the door without whatever it was I needed to not forget. I need this in my life ASAP. 

iPad Typescreen
{pin}
I just love typewriters, and it would be so cool to have this little contraption that turns your iPad into a typewriter of sorts. Granted, I would have to invest in an iPad too, but that's not the point. 

What things have you found on Pinterest that you just have to have?

***************************************************************************
I'm so excited to have my friend and beautiful newlywed, Raewyn from Be A Warrior Queen, back on my sidebar!


Hi, I'm Raewyn and I blog over at Be a Warrior Queen where I'm all about finding the positive, giving back and empowering girls and women around me! I'm a recent newlywed who is learning to navigate the waters between wife life and being a feminist. I want to start a magazine that embraces being yourself unashamedly. I'm still working on finding my style as a young woman in her mid-twenties. I would love if you'd stop by my blog and we could become the best of friends!   

What are you looking forward to this summer? 
I am looking forward to a bunch of Vegas trips, baby showers and a few concerts. Aka an AMAZING SUMMER

Where is your favorite place that you've visited?
I would have to say that the Netherlands has been my favorite place to visit! It seemed more like I was at home than on vacation, in the best way possible.

Where would you go on your dream vacation? 
My dream vacation would be somewhere tropical, like Antigua! 

Be sure to follow all of Raewyn's adventures:
read more " 9 Things I Didn't Know I Needed Before Pinterest. "

Rainbow Party + BIC® 4-Color™ Pen

This is a Sponsored post written by me on behalf of BIC 4-Color pen for SocialSpark. All opinions are 100% mine.


My love for themed parties stems from my love of Mary-Kate and Ashley. All of their party videos made me want to have "any kind of party - dance party, beach party, birthday party, pool party, sleepover party, homework party..." I just love a good party, and the best ones have themes!

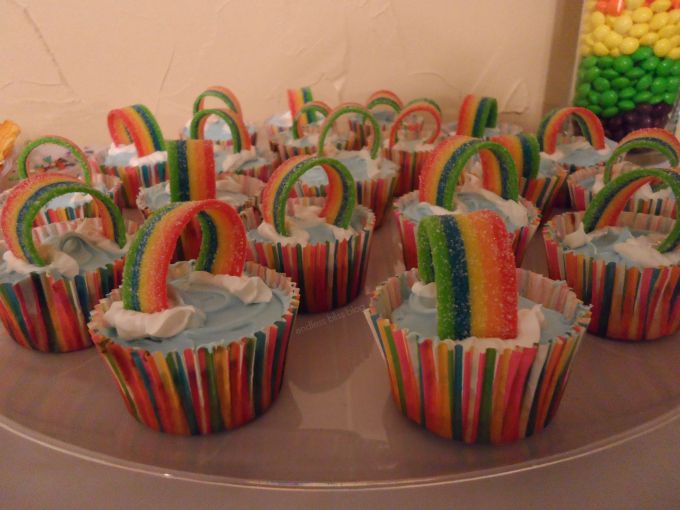
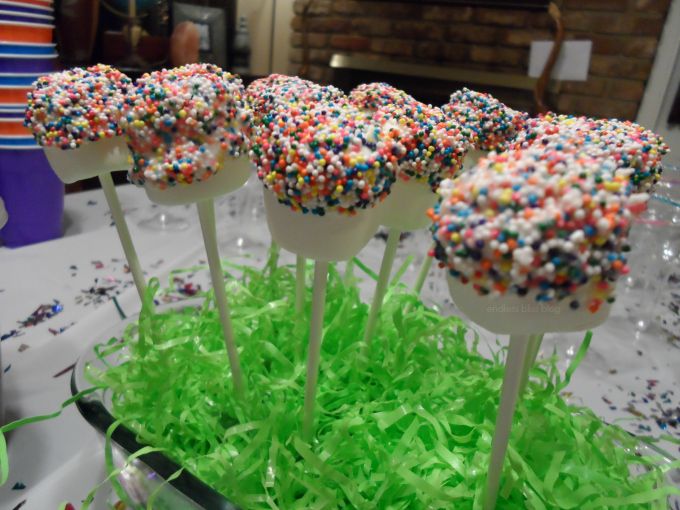
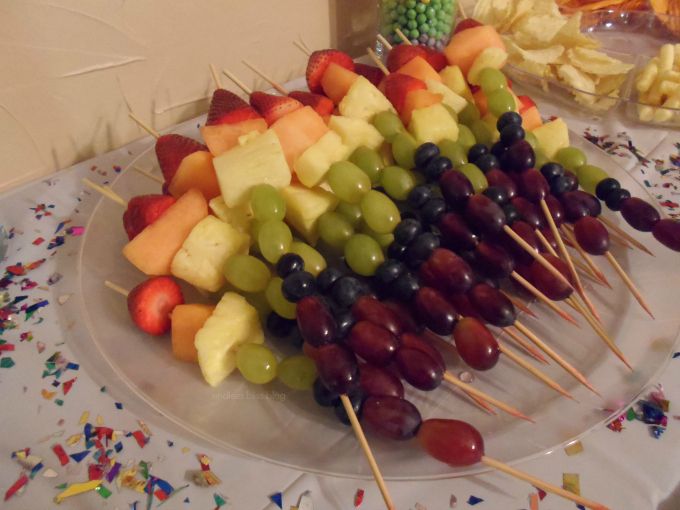
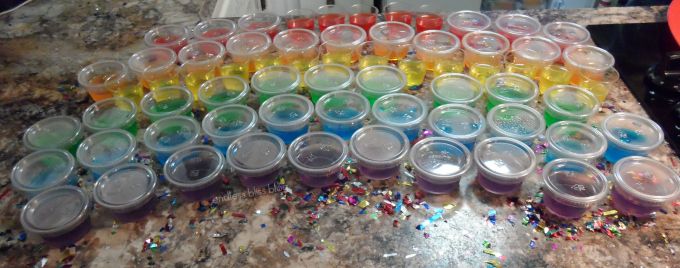
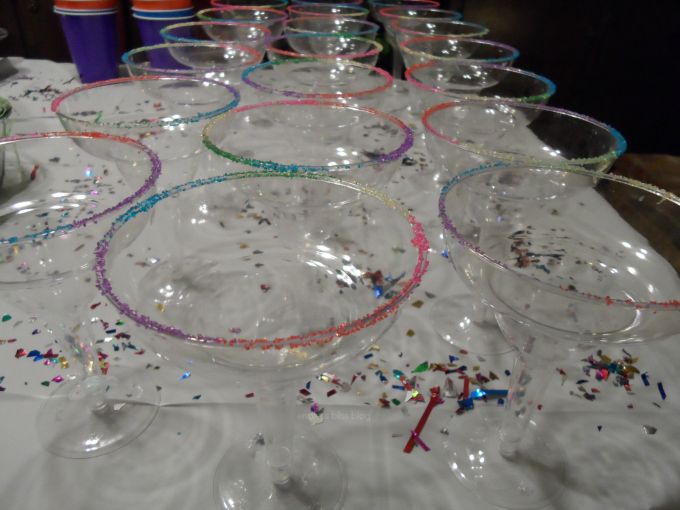
I recently helped throw a surprise rainbow party for a friend, and boy was it a blast! We had rainbow everything - food, decorations, drinks, pinatas. Their house was rainbowed out. So much color everywhere! It looked awesome, if I do say so myself.


The rainbow party was obviously super fun, but you don't need a special occasion to express yourself through color! I'm sure y'all remember those multi-colored pens from back in the day. I used to have at least three of them with a ton of colors on them. The pink one would run out first because obviously pink is the best color (even though it's not technically part of the rainbow, but whatevs).

BIC has an awesome pen that (1) lets me relive my childhood and (2) allows me to be colorful everyday - the BIC® 4-Color™ Pen! It's 4 Inseparable Colors in 1 Pen. How cool is that? All of my fellow OCD organized friends should be excited, because hellooooo color-coded notes! You don't even have to waste all that time picking up and putting down different pens. You can have four colors right at your fingertips. 
I'm sure lots of you like to listen to different types of music when you're in different moods. Now you can write with different colors that coincide with your moods that too!

Feeling proud? Write with the blue pen. Everybody loves blue. Blue cheese, blue skies, blue moon, blue jeans. Blue is everywhere, and he knows it and loves to show it. 

Feeling jealous? Write with green. I mean, green with envy. Green is the forgotten pen color. Not many people choose to write with green, but green is good for so many things - the environment, food, etc.

Feeling flawless? Write with the red pen. Red likes to go around correcting everybody - grammar, spelling, calculations. Red wants everything to be right and parallel.

Feeling forgotten? Write with the black pen. Black is the afterthought. Everyone wants to write with blue, but when blue's not available, black is there to save the day. 

What color are you? I'd say I'm a combination of all four colors. I would like to think I'm blue (da ba dee da ba die) in a humble way, but I know I have some red in me because I love correcting grammar (nerd alert. Judge me). 

Still can't decide which color you are? Watch the videos below for some inspiration:


Want to get your own BIC® 4-Color™ Pen? Visit Amazon or Staples and order yours today! Don't forget to like BIC® 4-Color™ on Facebook to learn more about the 4 personalities and find them on Twitter to follow the four color hi-jinks!

Color is one of my favorite ways to express myself! How do you like to express yourself? Do you like being colorful? Have you ever had a pen like BIC® 4-Color™?


Visit Sponsor's Site


read more " Rainbow Party + BIC® 4-Color™ Pen "

"open when" letters.


As most of you know, Jon and I just celebrated our 3-year anniversary. I decided to get a little creative with his gift this year and make him some "Open When" letters, inspired by a picture that I saw on tumblr about a year ago. I've been working on this gift since June, and I'm pretty excited about how it all turned out. 

What exactly are "Open When" letters? They are simply cards or letters that you give to someone, instructing them to open them at a specific time. Check below for some examples!

Ideas for your "Open When" letters:

Open When...
  • you need to know how much I love you.
  • you miss me.
  • you're not feeling well.
  • it's finals week.
  • you're on your way to see me.
  • you're going for a workout. 
  • we're miles apart.
  • you're sad.
  • you need a laugh.
  • you're having a bad day.
  • it's your birthday.
  • we're having a fight.
  • you're hungry.
  • you feel like it.
  • it's Valentine's Day.
  • you're bored.
The possibilities are endless! I had a ton of ideas, and I had a hard time narrowing them down. 

For my cards, I decided to include small gifts with a few of them. I've heard of a lot of people who just stick to the cards and letters, but I liked the idea of having my letters be different sizes, shapes, and colors. I've seen some that have all of their envelopes look just alike, and those are fine too, but I wanted mine to be colorful, chaotic, and fun. 

Ideas for small gifts to go with your letters:

Hungry: A gift card to somewhere the recipient likes to eat
Workout: A pedometer, sweatband or other small workout gear
Bored: A word search, Sudoku, Mad Libs or some sort of puzzle
Laugh: A joke book or list of jokes, a funny picture
Finals Week: 5-hour energy, coffee or a Starbucks gift card
Having a Bad Day: A mix CD of happy songs, happy pictures or a happy movie
Miss Me: A picture of the two of you together, a list of fun memories you've had together
Get creative with your gifts! The costs may add up, so make sure you think small, but significant. It also helps if you plan this gift in advance so you can spread out your spending over time.

Tips:
  • If you're starting this gift in advance, buy cards for every holiday.
  • Think of important dates coming up in the recipient's life, i.e. graduation, a family vacation, job interview, etc.
  • Collect cards with colorful envelopes. White envelopes look pretty boring unless you decorate them.
  • Think personal. Don't just stick to general cards like "I miss you" or holidays.
  • Write meaningful things in the cards. Don't just write your name.
  • Make the message in every card different. Don't be repetitive. 
  • If you include any food as gifts, make sure you write on the envelope when they need to open the envelope by.
If you have any questions or want to share any of your ideas, comment below or shoot me an email! Have a lovely Friday eve!

 photo withlovesignature_zpscd4b5559.png
read more " "open when" letters. "

DIY chevron and glitter countries.

Since it was so cold this weekend, I decided that I would spend it inside, avoiding going out at all costs. I stayed in my PJs, read a whole bunch, and got a little crafty! I was inspired by the canvases that I saw on Emily's Etsy shop and decided to try to make some of my own. I chose four countries with unique shapes, all ones that I would like to visit one day - Australia, England, Italy, and South Africa. I took the pictures with my phone, so sorries for the bad quality.
Materials:
Mod Podge
Glitter (I used gold glitter that I got from Wal-Mart)
Paint (I used navy and vintage white)
Paint brush
Canvases
Pencil
Steps:
1. I started by printing out pictures of the countries' outlines and traced them onto the canvas.
2. Next, I drew a chevron pattern around the country's outline.

3. I painted the vintage white chevron stripes first.

4. Then I painted the rest of the chevron stripes navy. I had to do two layers of the navy.

5. Next, I mixed one part mod podge and two parts gold glitter together.

6. I painted the mixture to fill in the country's drawing. I did two thick layers. Just do it until there are no more white spots!

7. And voila! Done! Admire your masterpiece!

I'm also participating in my first giveaway, so be sure to enter below!

Bits of Days / Noor's Place / I Have A Messy Bun
A Weekend Crossing / d'Asti at Tiffany's

a Rafflecopter giveaway

Terms and Conditions:
Open Worldwide.
Winner will be selected by Random.org.
Winner's entry will be verified then winner will be notified by email.
Winner has 48 hours to respond before a new winner is selected.


 photo withlovesignature_zpscd4b5559.png
read more " DIY chevron and glitter countries. "
09 10